Art Department
Batch Processing
“Deadline...today!” If, like me, you are familiar with that sentence then you will definitely appreciate this month’s column about batch processing images in Photoshop. The batch processing concept is simple: your “steps” to one image are “recorded” and then “played” again on any number of targeted images. (Those of you familiar with actions might have noticed the evident similarity; this is because Photoshop utilizes actions to accomplish its batch processing.) How effective is batch processing with Photoshop? Quite effective actually. Although the batch process takes a little while to set up, the results are astounding, saving loads of time.
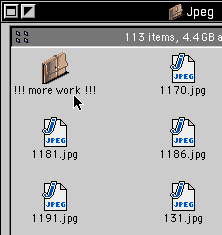
Convert 113 RGB JPEGs to CMYK PICTs? No problem!
Now, let’s see how it works:
- Place all images to be batched in one folder (which we will call “2b-batched” for explanation sake).
- Figure out what exactly you want to do with the images. (Crop, convert format or color, etc.)
- Break up the process. Basically, what you should always keep in mind is that the computer is very stupid. You can not assume that, just because you know what to do, the computer does too. So, a simple image resize consists of the following steps:
- Open file
- Choose “Image Size..” from under the “Image” menu
- Type in pre-saved numbers
- Save
- Close
This makes much more sense to a computer.
- Record an action with your resulting steps (you can override “Open file” and then activate the Override Action “Open” Commands check box in the batch process window).
- Select “Batch...” from the “Automate” submenu of the “File” menu.
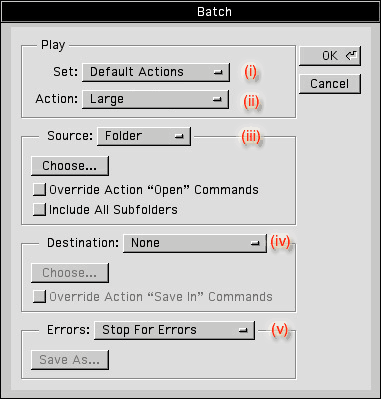
- The name of the set where your action is saved.
- The name of the action to be executed.
- The location of the folder to be batched (in this case call “2b-batched” folder)
- The location of where you want the resulting images to be saved.
- Error control.
With the above steps finished, all you have to do is select the “Ok” button and watch the computer do your work for you.
A word of advice: never under any circumstance show this to your boss or you will end up fired :-)
![]() Copyright © 1999 Jamal Ghandour, jghandour@atpm.com. Jamal Ghandour is
currently the Special Effects Director at the Lebanon Branch of CSS & GREY.
Copyright © 1999 Jamal Ghandour, jghandour@atpm.com. Jamal Ghandour is
currently the Special Effects Director at the Lebanon Branch of CSS & GREY.
Also in This Series
- Burning Your Own Music CDs · December 1999
- PDFs · July 1999
- Batch Processing · April 1999
- The Path · March 1999
- Web Buttons · February 1999
- QuarkXPress Trapped · December 1998
- Removing Moiré · November 1998
- HTML Editors · October 1998
- Photoshop Actions · September 1998
- Complete Archive
Reader Comments (0)
Add A Comment