Photoshop for the Curious
Don’t Reset—Preset!
Multi-hundred-page books could probably be written and still not cover every way in which Photoshop can be customized to speed up a designer’s workflow. Yet, Photoshop newcomers may not realize even the simplest ways to create presets for tasks they routinely perform. This month, I’m going to reveal two of my favorite types of presets for Photoshop.
New Document Presets
Setting up a new document is something most people probably rush through because they’d rather get started actually designing. Thus, it’s easy to miss that Photoshop allows a designer to save the settings for a new document for easy retrieval.
In my work, I create Photoshop images that begin life as one of a seemingly infinite number of sizes, resolutions, color modes, etc. However, there is one configuration I often define. Whenever I am working on a video editing project, invariably, there’ll be a spot where I want to bring in a full-screen graphic created in Photoshop.
I work with standard definition NTSC DV video. This type of video needs full screen graphics that are 720 pixels wide by 480 pixels tall at 72 pixels per inch. Since I set up new Photoshop documents with these specifications very often, I can let Photoshop fill in these values for me at the time I create the document. For this particular configuration, a preset is already available by default. Here’s what it looks like:
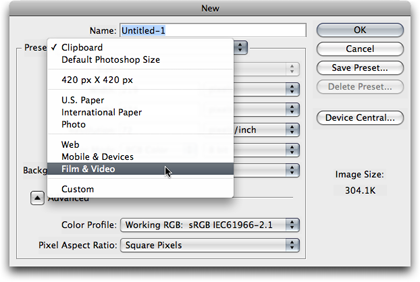
Photoshop includes several new document presets with settings frequently used by many Photoshop designers. Here, I’m using the Film & Video category.
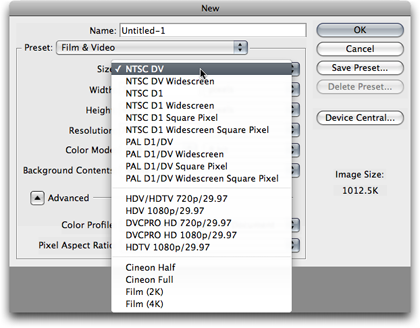
The Size pop-up menu is essentially a subcategory to the presets. I’ve selected NTSC DV.
Having chosen the desired preset for DV video, Photoshop automatically fills in the settings for a 720×480 document at 72 pixels per inch, RGB 8-bit color mode, no color management, and the standard pixel aspect ratio for DV video which is 0.9.
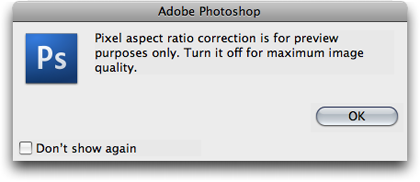
Pixel aspect ratio correction is only a preview feature which approximates proper dimensions that will appear on a television monitor. Photoshop warns designers that this feature is for preview purposes only. The document will save properly even though the aspect ratio correction will cause some distortion in the image.
A significant benefit to me in using the Film & Video presets is that Photoshop also adds standard television boundary guides to a new document created from one of these presets.
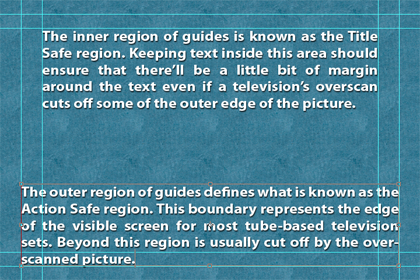
These guides are helpful not only for video, but should also be considered when creating Keynote or PowerPoint documents.
Even though Photoshop includes a lot of new document presets, a designer can create his or her own for frequently used configurations. For example, in the first screenshot above, there is a preset to create a square document at 420 pixels tall and wide. I created this preset because images in ATPM’s articles are set to 420 pixels wide in most situations. I think images look better if I submit them at this width instead of letting ATPM’s publishing engine scale them. So, in many months, I find myself creating numerous 420 pixel-wide Photoshop documents to accompany my articles, and this preset takes care of filling in those values, including the 72 pixel per inch setting.
Creating a new document preset is extremely easy, and I can even begin with an existing preset that is in the ballpark of the new preset I want to create. For example, in the US Paper preset, there are settings for Letter, Legal, and Tabloid sizes, but I often create flyers that are half of Letter size, and I wanted a preset for this.
First, I selected the Letter size of the US Paper preset, which filled in an 8.5 inch by 11 inch document at 300 pixels per inch. Next, I changed the dimensions to 5.5×8.5 inches. This creates a portrait-orientation document. If I want a landscape orientation, I can reverse the numbers to become 8.5 inches wide and 5.5 inches tall. Once I’m satisfied, I click the Save Preset button.
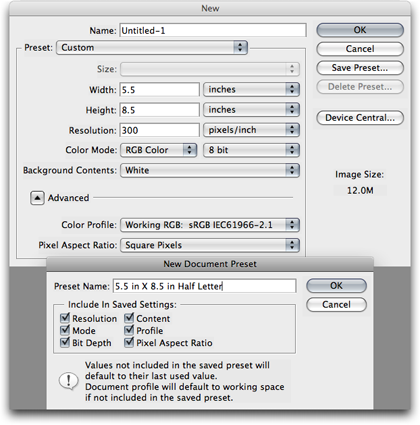
In the Save Preset dialog box, I provide a name for the preset, and can choose which settings should be included in the preset.
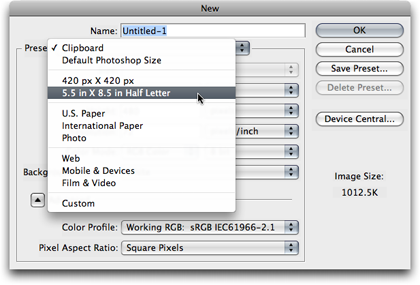
The next time I create a new document, I can choose my Half Letter preset. Note that the Size menu is only available when using built-in presets provided by Photoshop and is grayed-out when a custom user preset is selected.
Tool Presets
Just as presets can be created for new documents that are frequently used, presets can also be defined for Photoshop’s tools. Tool presets can be found in the menu on the far left side of the Options bar.
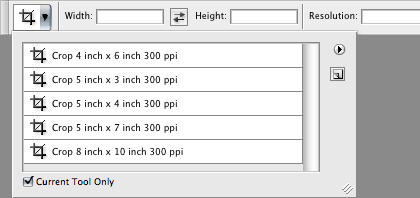
Presets for the Crop tool.
Note the checkbox at the bottom of the tool preset window. Unchecking it will provide a list of every tool preset that has been saved.
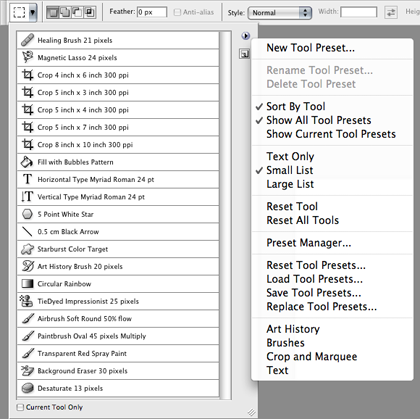
This screenshot shows all the default tool presets provided by Photoshop. Four categories of additional presets—Art History, Brushes, Crop and Marquee, and Text—are accessible from the palette menu.
Creating a custom tool preset is as easy as creating a new document preset. As before, I begin by defining the desired settings in the Options bar for the tool I’m using. For example, let’s say I often need to add text that is 36 point Optima Bold Italic with smooth anti-aliasing, center justification, and red color. Rather than re-specify those settings if I had changed them for a different task, I can create a preset to immediately restore them.
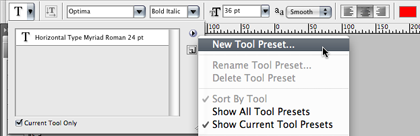
Saving a Type tool preset after configuring my desired settings.
The Options bar changes for each Photoshop tool to provide settings for the selected tool. Any configuration made to a tool via the Options bar can be saved as a tool preset for later use.
Homework Assignment
I have shared only two of the many places where Photoshop allows presets to be saved. There is a Preset Manager function under the Edit menu that reveals even more types of presets, but not all available presets are located here. Notice that the Preset Manager does not include new document presets.
This month’s homework assignment is look for more places where presets can be defined. Here’s a hint: search for keyword “preset” in the Adobe Help Viewer.
![]() Copyright © 2008 Lee Bennett, lbennett@atpm.com.
Copyright © 2008 Lee Bennett, lbennett@atpm.com.
Also in This Series
- File Format Fever · November 2008
- Don’t Reset—Preset! · October 2008
- Don’t Yield—Merge! · September 2008
- What If I Just Left It Alone? · August 2008
- Screen Replacements—When Reality Isn’t Real Enough · July 2008
- No Smoking Gun: Re-tooling Dodge and Burn · May 2008
- Mask-erades · February 2008
- Back in February · November 2007
- I Love Layers · October 2007
- Complete Archive
Reader Comments (0)
Add A Comment